Installing a rear view camera to a car radio with your own hands. How to connect a Chinese rear view camera. Installing a rear view camera yourself - instructions Install a monitor with a rear view camera yourself
The rear view camera is perhaps one of the most controversial elements of tuning, which motorists constantly argue about. According to some, it is meaningless and refers more to “show-offs” and “bells and whistles” than to useful assistants that drivers use every day. Others consider them a vital element, as well as the most useful invention after a car, and regularly use them when parking or leaving (checking in) to.
In my opinion, opponents of the rear view camera are the so-called “old believers”, these are experienced drivers who do not accept any innovations or useful options, they are “brutal” and use exclusively. For them, the car has remained just a means of transportation, and they do not want to keep up with the times, and therefore do not accept everything that is new and makes life easier. Personally, I believe that everything the owner does with his car is his personal business, besides, if it helps him live or drive a car, then why not? A rear view camera is better than the innocent face of some lady driving into your ass or side with the words: “Oh, I almost miscalculated” or “I’ve only been driving for a month and don’t know how to drive in reverse”... My article today is for those who are puzzling over how to install a rear view camera. I will try to tell you in detail how to do this, supporting each step with informative photos.
So for your attention detailed instructions on how to install a rear view camera

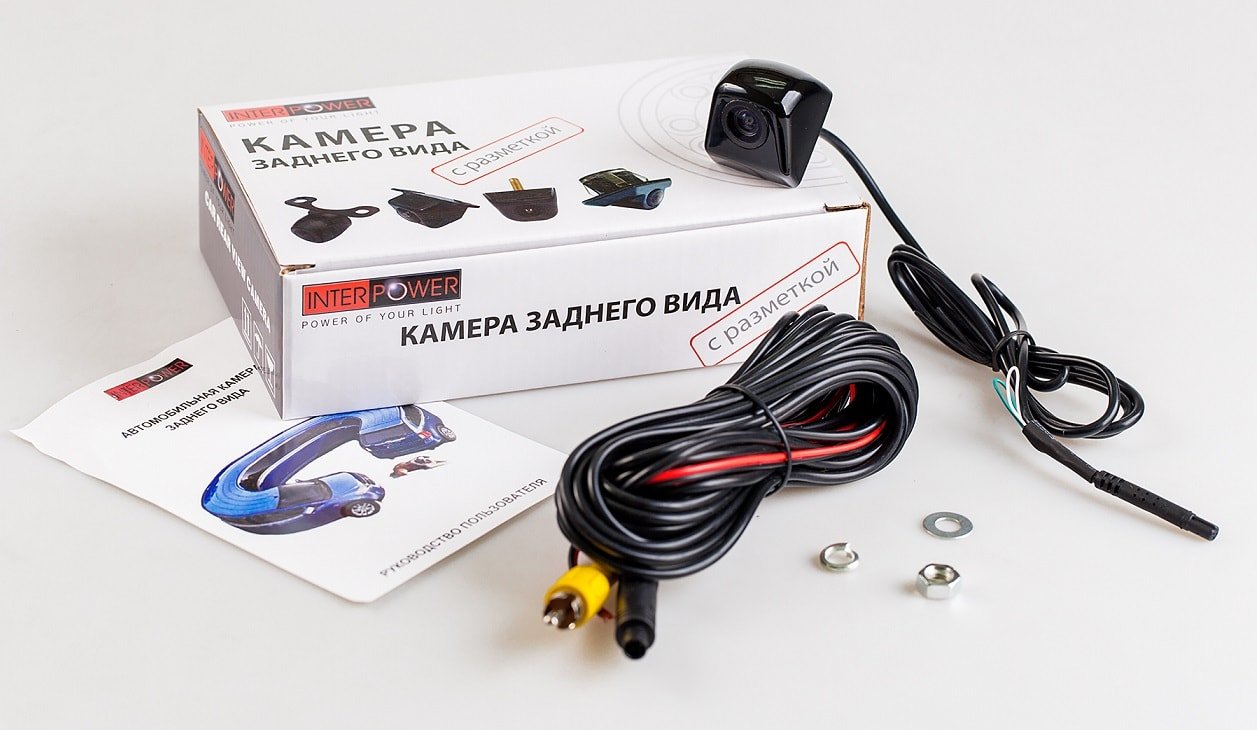
In my car I used the RM116B camera model, it’s not critical, you can choose another one to suit your taste. It is best to place the rear view camera close to the license plate light bulb, slightly recessing it into the body, away from the eyes.


The easiest way would be to install a rear view camera near the license plate lamp, on a plastic rim, but in this case it will be visible and will stand out strongly against the background of white license plates.

Taking into account such features, I decided to “push” it deeper into the bumper right above the number plate - that is, into the bar that holds the lighting lamps. In short, now there will be no problems with the holder, which is not bad, the mount will be hidden and there will be no need to pick the bumper. In order to repeat what has been done, you need to empty the luggage compartment and remove the frame with the numbers.

The output must be through the left hole, so that the length of the wire is sufficient.

Due to the deep location of the ramp, the rear view camera leg had to be slightly modified by lengthening it. This may be unnecessary for your camera model. In my case, the issue was resolved by simply using a metal plate approximately 4x6 cm.

The next step was to drill a hole for the reverse camera lens. Here it is necessary to calculate everything properly, so that later you don’t have to line it up or wrap it up, in other words - “Measure seven times - cut once!”

Installing a rear view camera is also unpleasant because you have to tinker with the wiring. I advise you to pull it into the luggage compartment using a plug or hole in the area of the rear bumper or spare wheel.

Now it’s time to start installation work and connecting the camera to the monitor, as well as laying the wiring inside the car.
First of all, remove the decorative trunk sill trim and the left part of the trunk trim, then remove everything unnecessary from the interior: seats, floor mats, door sills, etc. You will need access to the rear of the radio, so remove it and carefully examine the connectors.


I took the positive wire from the left rear, my wire color is white with a red stripe, it is connected to the lamp. The connection itself was made a little further so that it would be less noticeable. I've attached a wiring diagram so there shouldn't be any problems.

In the area of the dashboard I found a "plus" from the reverse light.
Next, you need to act extremely carefully; laying wires is a troublesome task. Using “original” fastening elements and clips... When the wiring is laid, do not rush to assemble everything, first check the functionality and correct connection of the equipment. I think there is no need to tell you how to test, I think everyone understands that if there is a picture and everything works fine, then the camera is installed correctly.
If testing is successful and the rear view camera is working correctly, adjust the camera position and proceed with reassembly in reverse order.
That's the whole setup...
I adjusted the lens a few days after installation; it is quite difficult to do this right away, since it is not clear at first how and where exactly the camera should look. Approximate viewing angle is - 120°.

Afterword...
Installing a rear view camera doesn’t matter whether you do it yourself or have it done at a service center - it’s a significant saving of money, an opportunity to gain invaluable experience, and the joy of doing the work yourself. Try it, maybe it will turn out even better for you than for me, as you can see, in my case it also turned out pretty decent. For those who doubt whether it’s worth it or not, I’ll answer - it’s better to spend money once and “sweat” on installing a reverse camera, rather than constantly “sweating” in tight parking lots and paying for your own and other people’s repairs...
Greetings, dear readers! Now we will continue experiments on installing additional equipment in a passenger car. And the topic of the article will sound like this: installing a rear view camera on the car with your own hands.
To be more precise, we will install a universal camera, which is suitable for all brands of cars, on the blog author’s small Kia Rio. I think that this direction will be of interest to many lovers of driving comfort.
The undeniable advantage of this non-model peephole is that it can be placed exactly in the center of the rear of the car. This arrangement, unlike the ceiling one, allows you to make the camera viewing angle more uniform. But on the other hand, it is more accessible to vandals.
In general, at this point everyone must draw their own conclusions, but we immediately move on to demonstrating the operation of the entire system:

And it all works as follows. When you engage reverse gear, a picture from the rear of the car with parking markings is automatically displayed on the mirror screen:

And now the side view:

A big plus is the fact that when reversing, the built-in LED backlight automatically lights up:

The general view looks like this:

In normal mode (when moving forward), the DVR application constantly writes an image from it, which can always be viewed on the mirror display:

Now regarding the sensational issue of the dust and moisture protection of such a camera from the Middle Kingdom. Well, what can I say at the moment, based on my personal experience of using it?
It was installed in late autumn 2015. As you have clearly seen, this peephole is located on the outside of the car. At the time of writing this article, no problems were noticed. I only wiped it off dust a couple of times. 😉

In general, my friends, let's move on to installing a rear view camera with our own hands on our experimental car. Let me remind you once again that it is the baby Kia Rio in a hatchback body.
So, the whole process begins with the mandatory partial disassembly of the luggage compartment. There you need to remove the casing near the lock, and also remove the door itself:

And here comes the first important point. In the picture above, notice the wire harness that is circled. Remember its location, it is through it that we will lead the wires from the camera itself. This is what it looks like:

Now we unscrew the license plate and see these wonderful holes in the bumper:

I think that now the further course of events has become clear to you. We take the wires from the camera and carefully pass them through the mounting frame of the license plate. Then we put them into these holes, and then we put them into the trunk through the plug:

The picture above is a top view. Look carefully at what should happen in the end. Naturally, after all the manipulations, we again crimp the entire wiring harness well so that moisture does not penetrate into the trunk.
Now we need to remove the left side trim. To do this, you need to unscrew all the screws at the bottom:

And then gently pull the panel itself towards you:

Now look carefully. In the opened space we will see a block with wiring (picture above). So, the red wire from our rear view camera needs to be connected to white-orange wire in this block.
To do this, disconnect the block itself and insert a red one into the pin with the yellow-orange wire. After this, we snap the block again. As you can see, there is no soldering, which means no loss of warranty:

Thus, we apply voltage from the positive of the reversing light so that the image is automatically displayed on the mirror display when reverse gear is engaged.
Well, then everything is much simpler. Under the same panel, we run the wires from the camera to the area of the rear left door, remove the sealing rubber between the ceiling and the trim, and lead the entire harness to the front pillar. Here's the general diagram:

I repeat once again that there is no need to disassemble anything in the cabin at all. Just remove the rubber seal and that’s it. And already in the bow you need to remove the front pillar trim to run the wire under it:

Once again it is worth saying that you need to be careful when removing the casing, since it is attached to a kind of shock absorber that prevents it from being completely removed.
Therefore, carefully pull only the very top part at a 90-degree angle:

Then we hide the tourniquet under the ceiling and bring it all the way to the mirror. To get rid of the remaining wires, I recommend removing the lampshade and discreetly packing everything in the opened space:

Well, friends, this is where our simple DIY installation of a rear view camera on a car has come to an end. As you can see, there is nothing complicated or very abstruse in this process. Everything turned out to be very simple.
But if you have any questions, ask them in the comments. We will work together to solve your problems. And now I propose to laugh a little with funny eccentrics.
In this article, we will consider in detail how to select the necessary equipment, connect it without professional skills, as well as what installation methods are available today.
Selecting a rear view camera

Modern manufacturers offer a large selection of a wide variety of rear surveillance cameras for cars. Most of them are devices from China, which, however, are sometimes not inferior in quality to flagships.
In order to make the right choice and select the optimal camera for your car, you need to pay attention to the following parameters:
- price— cost for any buyer is one of the main criteria. In the case of these gadgets, the price of the product may differ several times, depending on the manufacturer. If you are choosing a camera only to use it occasionally, then you should not consider high-resolution offers for a lot of money. Select the average price category;
- permission- the main parameter on which the quality of the picture on the monitor largely depends. The higher this indicator, the better the device will work, however, as we mentioned above, not everyone needs a super-quality picture;
- sensitivity to light- a very important parameter for urban residents of the northern regions, as well as in cities where there is a problem with road lighting. At low sensitivity, after dark, the camera practically ceases to perform basic functions even with high resolution;
- viewing angle— each car owner chooses how many degrees it is necessary for the camera to rotate. As a rule, manufacturers offer options from 120 degrees to 180. If you are not sure which one you need, then you can stop at the middle option;
- presence of a monitor— if your car does not have a built-in monitor, then it is better to choose cameras complete with a monitor to display the image.
Rear view camera installation methods
An important factor is also the method of installing the rear view camera for the car. In general, there are two main installation options:
- a camera and a separate system for displaying images - this can be a connection to a built-in multimedia system or a separate connection to a separately installed screen. Perfect for those who already have a monitor and also do not want to change the overall design of the car and replace the rear view mirror;
- camera with a mirror - this option provides for displaying images from the device directly on the rear view mirror. This happens in the following way: either a special mirror with a small built-in screen is selected or a special overlay is applied to the factory mirror. Suitable for professional drivers who can easily get by with such a replacement.
In addition to the installation method, there is also the need to choose the location where the camera will be installed.
You may also be interested in our specialist's article, which talks about without a cigarette lighter.
Do not know, ? Then be sure to read our author’s very interesting and informative article.

The location largely depends on the car model, as well as where it will be easier to install the gadget. Some of the most common options:
- lampshade for illuminating vehicle license plates. Some manufacturers offer all the necessary parts to mount the rear view camera in this location. The advantage is that the backlight improves image quality;
- into the trunk handle. Suitable for cars whose handles are made of a single body with molding. The camera can be secured using ordinary self-tapping screws;
- attach to a license plate - also a common option that will suit all car models.
You can choose the option of installing a rear view camera either independently or with the help of specialists who will take into account the characteristics of the car, as well as the suspension height and the characteristics of the roads in the region.
Required tools and materials
Just buying a camera is not always enough. Connecting a rear view camera with your own hands requires additional tools and some materials.
First of all, many car owners forget that before installation, the car and especially the mounting area must be thoroughly cleaned. You can use professional cleaning services or remove dust and dirt yourself. If you skip this step, the mount may not secure properly.
Also, depending on the type of fastening and installation method, you need to clarify what additional parts you will need. It can be:
- self-tapping screws;
- cables;
- adapters;
- cords;
- power supplies, etc.
It is necessary to clarify specifically for the selected rear view camera model. Some manufacturers provide complete kits with all the parts for self-assembly.
Rear view camera installation steps
Let's look at the detailed instructions on how to install a rear view camera if you choose a location above the rear bumper of the car, connected to the built-in Pioneer monitor.

Preparing the site for camera installation
The chosen location for connecting the camera has several advantages. First of all, a wide viewing angle and the absence of disturbing parts. However, there is also a minus. The camera remains “on the street” and is accessible to strangers. Therefore, this option is suitable for car owners with garages, or if the block above the license plates is more recessed, thereby creating a place to hide the camera. You must first secure the camera bracket by drilling 4 holes for mounting and 1 for the power cable.
Power connection
The most critical stage is connecting the car to the general electrical network. If you do not have experience in such work, then it is better to contact a specialist so as not to damage the device. If there is a general understanding of how and what works, then you need to follow these steps.
Any camera has two wires: for power and for transmitting a video signal. Since most cameras have short wires, they need to be extended so that they reach the monitor. Extension cords are often included.
The power is most often connected to the tail lights. Thus, simultaneously with the reverse gear being engaged, the camera will also turn on.
Wiring cables inside the car
All wires must be routed through the trunk and interior, hidden, to avoid breakages. This can be done in two ways: either secure everything under the casing, or secure the wires with special clamps.
The advantage of the first option is that the wires will not be visible, however, this method requires a more detailed and large-scale disassembly of the car, which not everyone wants.
The second method is easier and faster, but there is no full guarantee of the absence of breaks.

A rear view video camera is an excellent solution for monitoring the movement of a car in reverse, since the mirrors do not allow you to fully see what is behind the car. Although you shouldn’t rely heavily on one video camera, because it also has its drawbacks (switching on with a slight delay, limited viewing angle, insufficiently clear resolution).
Connecting a rear view camera requires some knowledge and skills, so not everyone can do it themselves - you will have to go to an auto electrician. But most drivers cope with this task perfectly, especially if you carefully read this connection manual.
Typically, for cameras for video surveillance of the situation behind a car, the connector on the board is black - minus and ground, red + power, maybe 3.3 volts and 5 volts, yellow - complex video output. There are also controls - white or brown, but this depends on the manufacturer. Red, black and yellow are generally followed by all camera manufacturers. To check, connect it to the TV through a regular “tulip” - it should show.

Rear view camera pinout to 3 wires


4 wire rear view camera pinout


Rear view camera pinout for 5 wires


Rear view camera pinout for 6 wires
Here the same kitchen as on 3, 4, 5 wires, the masses are simply output separately to each line. Camera wire pinout:
- Red wire “+” to the reversing light.
- Yellow wire "+" to the video signal tulip.
- The remaining wires are “-” to the video signal tulip.


Pinout of camera wires with backlight
The infrared illumination on the rear view camera displays the image in color in sufficient light, and in insufficient light, thanks to the IR illumination, displays the image in black and white at a distance of approximately 5 meters. So, their presence on rear-view cameras is relevant, unlike recorders, where they are of an advertising nature for “night photography” without practical application, which cannot be said about LED backlighting on rear-view cameras - it’s better without them than with them!

Connecting two car cameras to a monitor

The operating principle is such that when reverse gear is engaged, voltage is applied to the coil, the rear camera is turned on, and the power contacts of the front camera are open. When the rear camera is turned off, the relay is switched off and sent to the button through contact 87a plus. We turn on the button - the front camera works.

Installing a rear parking camera

Connecting a camera from reverse (classical). The camera is connected to the reverse wiring: plus to plus and minus to minus. When you turn on the reverse gear, it goes from the reversing light to the reversing camera, and it sends a signal to turn on the monitor automatically, so there is no need to do any additional manipulations. The reversing camera automatically turns off when reverse gear is disengaged. The camera is connected using a cord, which is initially located on the wiring next to the camera, or using a wire with a plug, for which there is a plug on the camera wiring.

There are even wireless rear view cameras (video transmitter and video receiver with a radio channel), then the connection will look like in the diagram.


Rear view camera installation methods:
- into the number plate illumination socket or in the trunk handle or place for the camera - no damage is caused to the car;
- camera in license plate— the hole for the cord is not visible, since it is behind the frame;
- mortise camera- based on the peephole principle, convenient among parking sensors, in the lock cylinder or just the body;
- on the pin— minimal damage, since the wire passes through the pin itself, is invisible, installation with the pin up;
- invoices- have a certain angle and minimum dimensions, often have a certain position for installation;
- on the bracket— convenient because you can mount them in almost all places and change the angle of the camera and rotate the image.

Please note that all cameras are usually powered by 5 volts, there is a voltage stabilizer in it and it supplies 3.3 volts to the camera itself; for some, this stabilizer can withstand a supply of 12 volts, but this is rare, usually it burns out. On ordinary Chinese cameras powered by 12V from the reversing light, a 5-volt stabilizer is sealed in a plastic fork of the wire for power and tulip; the camera itself also contains a 3.3-volt stabilizer.
Replacing a rear view camera - instructions
Like any other electronic device, these camcorders sometimes burn out (especially if power is constantly supplied to them). Then the replacement steps will be as follows:

1. We remove the camera.
2. We cut off the standard harness from the camera, closer to the camera. It will be in a shielding braid, the braid will be prepared for soldering with another similar braid from the new camera.
3. A cord with a tulip-type connector comes off the new camera. A long cord is attached to it, which should stretch all the way to the screen. We don’t need all of it, since our screen has standard wiring that we connect to. We cut off the connector with a small piece from the long wire and clean it. There will be a central core inside the braid. We will need both.
4. We solder the wires of the cut standard harness to the new camera:
- Yellow on the standard one - to the central core, cut by the new chamber.
- Braid from a standard one to braid from a cut new camera
- Black on the standard one - to the negative wire on the new camera (usually black)
- The red one from the new camera needs to be connected to the positive wire that powers the reversing light (green with a white stripe)
5. Turn on the ignition, put the automatic transmission selector in position R. If there is an image, everything was done correctly.
If you power the camera from a reversing light, there may be ripples on the screen when you turn on the camera - you will have to connect it from the power supply via a relay. It is necessary to turn it off, because if +12V is constantly supplied to the video camera (for example, from the license plate light), then sooner or later its voltage converter will burn out.

Don’t forget to carefully solder and insulate everything, preferably with heat shrink. It is advisable to cut the cords with a margin so that you can quickly replace the camera in the future without disassembling the casing. Before cutting the cords on a standard camera, you need to be sure that it is not working. The issue of attaching a new camera is purely a plumbing issue and can be solved without any problems. It is better to take an infrared camera - it “sees” better in poor lighting.
Video instruction
Or directly), we offer you tips, and sometimes even requirements, for connecting the camera’s power in a car, as well as a short but very detailed video instruction. Let's conditionally divide the article into several parts:
- What to do if the installed camera does not work or is unstable?
Connecting power to a rear view camera in a car.
Connecting power to a rear view camera is an important and much more labor-intensive process than it might seem at first glance. Incorrect power supply can lead to breakdown of the device itself, damage to the car wiring, incorrect operation of the camera, or poor or unstable picture quality.
First of all, The "+" and "-" of all connected devices must come from the same place. This is an axiom and the cornerstone of connecting electronics in a car.
Secondly, study the operating logic of the installed equipment. As a result, the connected camera should not stand out from the overall picture. What does this mean in practice:
If, according to the operating logic of the already installed equipment, all electronics are turned on at the moment power is supplied to the head unit / monitor, then the camera must be connected accordingly. In many cars, the standard reverse camera (even if there is none) is designed to turn on simultaneously with the car's ignition. This approach ensures that the matrix is already warmed up and excellent image quality, especially in the dark, and also, in some cars, activates the video input for the camera.
- If you want to connect your camera this way, you need to research the camera's minimum power threshold and use a voltage converter. This is a small block that, from an input of 7-30 V, produces the voltage required for the camera at the output. It must be selected depending on the battery of the camera itself. For example, in our assortment for this purpose there are voltage converters for , and 7.5 V, respectively.
- If the rear view camera (note, not the image from the camera, but the camera) is activated when reverse gear is engaged, you can connect power to the rear lights. If there is a “pure” plus and minus there, feel free to connect. If the signal is pulsating (PWM ripple), then to level the signal it is necessary to use a filter, for example, a capacitor.
Our engineer, whom you all know, told us how to properly connect the camera’s power. We highly recommend viewing. And don't forget to like the video and subscribe to our YouTube channel, if you haven't already done so.
- Camera activation. When connecting a rear view camera via a video interface, activation, depending on the vehicle, occurs via the CAN bus or using +12 V from the reversing lamps. Therefore, when connecting a video interface, you need to go to the engineering menu (Factory menu) and configure the activation method (CAN bus or Rear wire).
- Monitor Definition. When connecting a video interface, it is necessary to correctly determine the diagonal / resolution / type (in some cases) / monitor manufacturer (in some cases) and set the DIP switches accordingly.
- Definition of standard/non-standard camera. When connecting a video interface, you must correctly set the position of the DIP switch, which is responsible for determining which camera the picture should be output from. That is, if you connect a non-standard rear view camera, the video interface must identify this camera and activate the image when reverse gear is engaged. If the car already has a standard camera installed, and you use the video interface to connect navigation or video devices, then set the DIP switch to the appropriate position. The instructions for the video interface will help you with this.
- Definition of color system. Before purchasing a camera, find out which video signal standard your car supports (PAL or NTSC). The standard of the camera and the car must be the same. Many people believe that the video interface somehow adjusts the signal to the desired standard. However, this is a misconception. The video interface passes the signal as it is. If you still bought a camera with a different signal standard, use a converter.
Typical mistakes when connecting a rear view camera
- Food taken from different places. In most cases, “+” is taken from the reverse lamp, and “-” from the body. We strongly, strongly ask you not to do this, we even insist. In such cases, a phenomenon called a potential difference arises, and at different points the voltage may differ and constantly change. This phenomenon affects the operation of the electronics of connected devices and leads to destabilization and poor or unstable picture quality. ALWAYS take the plus and minus from the same place!!! For example, from a monitor or head unit.
- Power connected to pulsating signal from the reverse lights. In many cars, especially German ones, the signal on the reversing headlights pulsates. This was done specifically to diagnose the performance of the light bulb in the headlights. So, if you have just such a signal, you need to level it and install a filter, which, in turn, needs to be separated from the system by an LED. If you install a capacitor to smooth the signal, but do not separate it from the standard system, then the already smoothed signal will go to the reverse lamp, and the on-board computer (the unit that processes this lamp) will receive incorrect data. (see video).
- Connecting the camera according to the principle of constant operation without using a voltage converter. Then there is a very high probability that your camera will simply burn out. And by the way, this happens repeatedly.
- Video signal standard mismatch cameras and car multimedia systems.
What to do if the installed camera does not work or is unstable?
- First, never install a camera without checking it first. This will save you and your clients a lot of time and nerves. We test the devices we sell, however the camera may be damaged due to shipping or other circumstances. Therefore, first make the connection “in weight”. If everything works, feel free to carry out the installation.
- Check the connection cable. The supplied cable is usually from 3 to 5 meters long. Accordingly, when laying it, it may bend or break. This is quite common.
- Check that the power connection is correct
- Are the plus and minus taken from the same place?
- Does the connected rear view camera work according to the same logic as all installed electronics?
- Is a voltage converter used?
- What signal is supplied to the camera, pulsating or constant (for more details, see above in the article and in our video)
- If switching to image fails from the rear view camera when you engage reverse gear, that is, it sometimes switches, sometimes it doesn’t, which means you connected power to the pulsating signal of the reverse lights. Level it up. And do not forget to separate the capacitor from the system with a diode. (see information above and video).
- If when connecting the camera via the video interface the image is not displayed or the image is of poor quality, check the camera activation settings in the Factory menu, as well as the correct positions of the DIP switches.
- If the image is distorted or instead of an image there is a black and white picture, or no picture is displayed at all, most likely the video signal standards of the rear view camera and the car’s multimedia system do not match. Buy a camera that supports your car's color system, or use a converter.
Now you know everything about properly connecting a rear view camera. Stick to these rules and you will have a very useful and stable assistant. If, after connecting, your camera is unstable or produces a bad picture, you know what to ask your installer.
We strongly recommend that you contact only trusted workshops and installers who know a lot about electronics. Otherwise, you can lose time, money, and nerves. If you are not sure about the master, let him read this article and video. This will greatly increase your chances of a successful installation. ☺
If you still have questions about connecting the rear view camera purchased from the Car Solutions store, contact our technical support. Our technical specialists will try to help you.
And in the next article we will tell you how to choose and where best to install a rear view camera. Subscribe to the newsletter and you'll know when it's available. We will also inform you about new products, promotions, video reviews, etc.
Copying materials from the car-solutions.com website is permitted only if you indicate the authorship and place a back text link to each copied content.